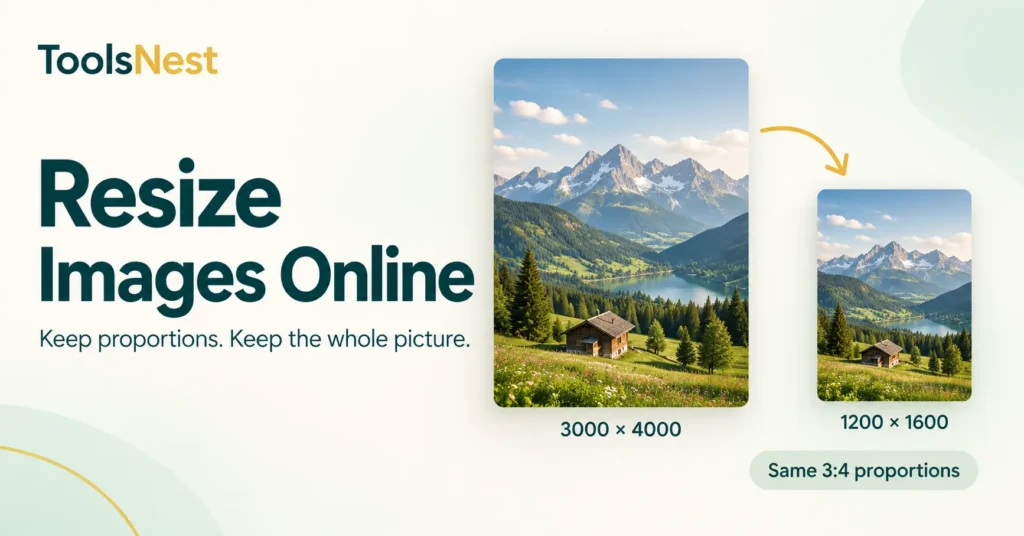
A website asks for a smaller photo, so you enter a new width and height. The downloaded image fits the requested space, but faces look wider and objects seem flattened. What went wrong?
Usually, the width and height were changed without preserving their relationship. To resize images online while keeping their shape, adjust both dimensions proportionally.
In this guide, you will learn which settings to use in the ToolsNest image resizer, how to choose between pixels and percent, and how to check your downloaded file. A real test with a portrait WebP photo shows the process from start to finish.
Table of Contents
Why Images Stretch When You Resize Them
An image’s aspect ratio expresses its width and height as a pair of proportional numbers. A 3000 × 4000 portrait photo has a 3:4 ratio. A 1200 × 1600 version keeps that same relationship.
If you force the entire portrait into a 1200 × 1200 square, its proportions change. To make it square without distortion, you would need to crop part of the scene or add space around the picture.
For more background, see MDN’s explanation of aspect ratio.
The practical approach is to keep proportions enabled and enter one target dimension. Let the tool calculate the other.
How to Resize Images Online with ToolsNest
1. Choose Your Image
Open the ToolsNest Resize Image tool and select the picture you want to adjust.
Keep your source file in a separate folder. The resized copy may suit a website or upload form, while the larger original remains useful for future edits.
For the test below, we selected the WebP file produced during our earlier compression walkthrough.
2. Choose Pixels or Percent
The Resize by menu offers two approaches:
- Pixels: Enter the required measurement directly, such as a width of 1200 px.
- Percent: Choose this when you want to scale the picture relative to its current dimensions.
For example, resizing a 3000 × 4000 image to 50 percent produces dimensions of 1500 × 2000.
When Pixels is selected, the Percent field does not control the result. A number may remain visible there, but the width and height settings determine the output.
3. Enable Keep Proportions
Leave Keep proportions checked.
If you need an image that is 1200 pixels wide, enter 1200 under Width (px) and leave Height (px) empty. The tool calculates a matching height.
For a 3000 × 4000 source, the calculation is:
New height = 4000 × (1200 ÷ 3000) = 1600 pixels
You can work from the height instead: enter the required height and leave the width blank.
4. Leave Do Not Enlarge Checked
The Do not enlarge option prevents the output from exceeding the source dimensions.
This is especially useful when selecting several images of different sizes. A target width that reduces a large photo could otherwise enlarge a smaller one.
Increasing pixel dimensions does not recover missing detail. Before enlarging a small picture, check whether you have a higher-resolution source.
5. Resize and Download
Click Resize, then download the result.
Open the saved image and check its dimensions. Windows users can find the saved width and height in the file’s Properties window, under the Details tab.
Inspect the picture at the size where you plan to use it. Pay attention to small lettering, faces, fine patterns, and important edges.
Our Real ToolsNest Resizing Test
We used a portrait WebP photo created during our earlier image compression walkthrough.
The starting file measured 3000 × 4000 pixels and appeared as 1.28 MB in the tool. For this test, we set only the width to 1200 px; Keep proportions and Do not enlarge remained checked, with no height entered.
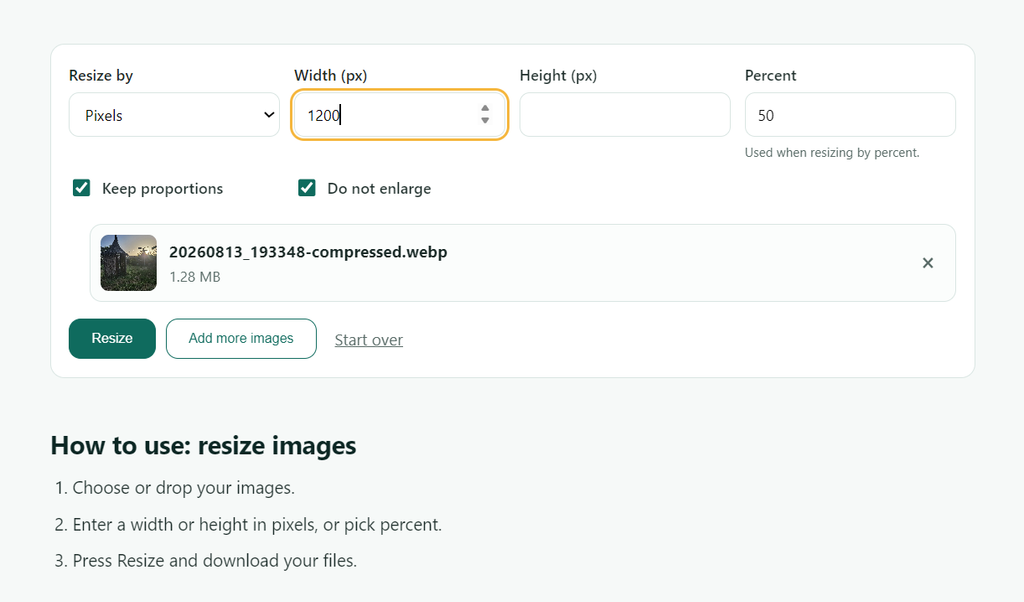
Test settings: Pixels mode, a width of 1200 px, an empty height field, and both Keep proportions and Do not enlarge enabled.
After resizing, ToolsNest displayed an output size of 421.1 KB. The downloaded file’s properties showed 1200 × 1600 pixels and approximately 421 KB.
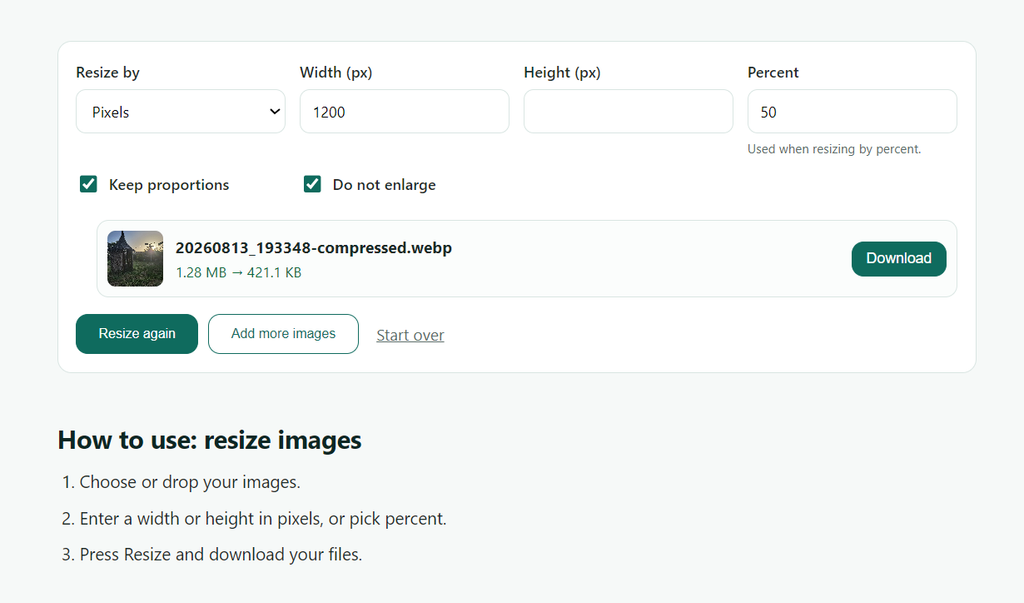
ToolsNest displayed a change from 1.28 MB to 421.1 KB. The downloaded dimensions were checked separately on the computer.
| Measurement | Before resizing | After resizing |
| Format | WebP | WebP |
| Width | 3000 px | 1200 px |
| Height | 4000 px | 1600 px |
| File size | 1.28 MB shown in the tool | 421.1 KB shown in the tool |
| Aspect ratio | 3:4 | 3:4 |
The matching aspect ratios confirm that the width and height changed proportionally.
The smaller version contains fewer pixels, but that does not let us predict an exact file size. The exported file’s size also depends on the detail in the picture and how that detail is encoded.
This test confirms the downloaded dimensions and file size. It does not establish that every fine detail looks identical to the source.
What If You Enter Both Width and Height?
With Keep proportions enabled, ToolsNest fits the image inside the dimensions you enter.
For example, a 3000 × 4000 portrait placed within a 1200 × 1200 limit becomes 900 × 1200. It fits inside the requested box while retaining its portrait proportions.
This explains why the downloaded image may not match both numbers exactly.
If you need a square composition, use the ToolsNest crop image tool to choose which part of the scene to keep, then resize it.
Disabling Keep proportions allows width and height to change independently. Use that setting carefully because it can stretch or flatten the picture.
How to Choose Suitable Image Dimensions
Start with the destination’s requirements.
An upload form may specify a maximum width and height. A website may need an image that fits its content area, with enough resolution to remain clear on sharper displays. A square thumbnail requires a different composition from a portrait.
Here is how three image shapes scale when their width is set to 1200 pixels:
| Source dimensions | Target width | Proportional output |
| 3000 × 4000 | 1200 px | 1200 × 1600 |
| 4000 × 3000 | 1200 px | 1200 × 900 |
| 2400 × 2400 | 1200 px | 1200 × 1200 |
These examples illustrate the calculation. They are not universal size requirements for every website.
Resizing or Compression: Which Do You Need?
Resizing changes image dimensions. Compression adjusts how the picture data is stored and can reduce file size while retaining the existing width and height.
In our workflow, the JPG-to-WebP conversion happened first. The resizing test then used that existing WebP as its starting file.
Choose your next step based on the problem:
- The picture has more pixels than needed: Resize it.
- The dimensions fit, but the file exceeds an upload limit: Try compression.
- The destination requires a different shape: Crop the composition or add padding.
If you need to adjust file size after resizing, use the ToolsNest image compressor. Check the result rather than assuming a particular width will guarantee a particular number of kilobytes.
Common Resizing Problems
The Picture Looks Too Wide or Too Narrow
Check whether Keep proportions was disabled. Return to the source and resize with the option enabled.
The Image Did Not Become Larger
Check Do not enlarge. When enabled, it prevents the output from exceeding the source dimensions.
Consider finding a larger original before disabling that protection.
The File Is Still Too Large
Confirm the required dimensions, then try compression. Repeatedly shrinking a screenshot can make its text difficult to read.
The Result Looks Blurry on the Website
Check how large the website displays it. When the page displays a picture beyond its saved pixel dimensions, fine details may appear blurred.
Export a suitable size from the source instead of enlarging an already reduced copy.
Frequently Asked Questions
Can I change the image dimensions and still keep the whole picture?
Yes. Keep proportions enabled and enter one dimension. The image becomes smaller or larger while retaining the scene’s shape.
Can I turn a portrait into a square without stretching it?
Yes, by cropping the picture or adding space around it on a square canvas. Proportional resizing alone keeps the portrait shape.
Does 50 percent make the file half as large?
No. It halves both pixel dimensions. The resulting file size also depends on image content and encoding.
Will resizing always reduce file size?
No. Smaller dimensions often help, but the export settings and the source’s existing compression also affect the result.
Should I replace my original file?
Keep the original and save a separate resized copy. Downsizing removes detail that ordinary enlargement cannot reliably restore.
Check Your Resized Image Before Publishing
Before uploading, confirm the saved dimensions, inspect important details, and check the destination’s file-size limit.
Our test preserved the portrait’s 3:4 proportions, and the downloaded dimensions matched the expected result. That is the key check when you want a smaller picture without changing its shape.
Try the ToolsNest image resizer, set one target dimension, and keep your source file for future edits.