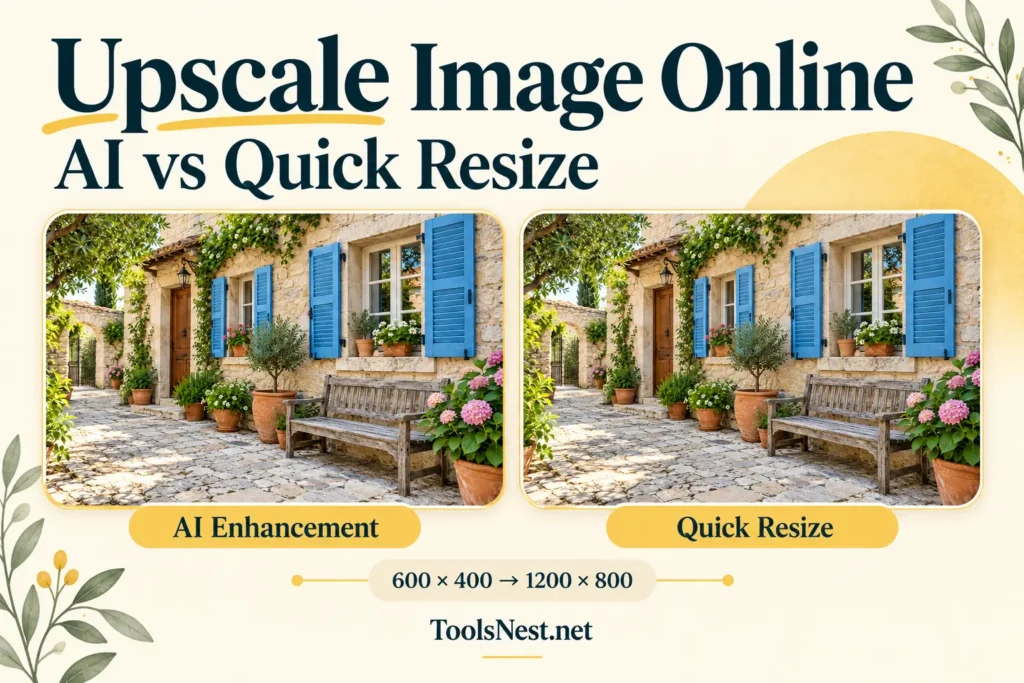
I wanted to upscale an image online and see whether AI enhancement would give me a noticeably different result from ordinary resizing.
Using the ToolsNest image upscaler, I enlarged the same courtyard image twice: once with AI enhancement (ESRGAN) and once with Quick resize. Both runs used a 2× scale and a PNG download.
Each method produced a 1200 × 800 image from my 600 × 400 source. Below are the settings, measured file sizes, and practical checks that help decide which version to keep.
Table of Contents
My Test Image and Setup
The sample shows a stone courtyard with blue shutters, plants, flowers, and a weathered wooden bench. I used an AI-generated image for this demonstration; the processing steps and downloaded files came from the actual tool test.
This scene gave me several features to examine:
- Straight edges along the shutters and window frames.
- Narrow gaps between the wooden bench slats.
- Small leaves and flower petals.
- Uneven textures across the wall and paving.
The generated image measured 1536 × 1024 pixels. I first reduced it to 600 × 400 using the ToolsNest resizing tool, then saved that smaller version as PNG.
The resulting source file measured 689,855 bytes. I used this exact file for both enlargement methods.
Why make it smaller first? I needed a controlled starting point. This was a test of enlarging a deliberately downsampled image—not restoring an old photograph, fixing camera blur, or recovering a damaged file.
For normal publishing, keep and use a suitable larger original when you have one. Shrinking it first would discard information unnecessarily.

How to Upscale an Image Online with ToolsNest
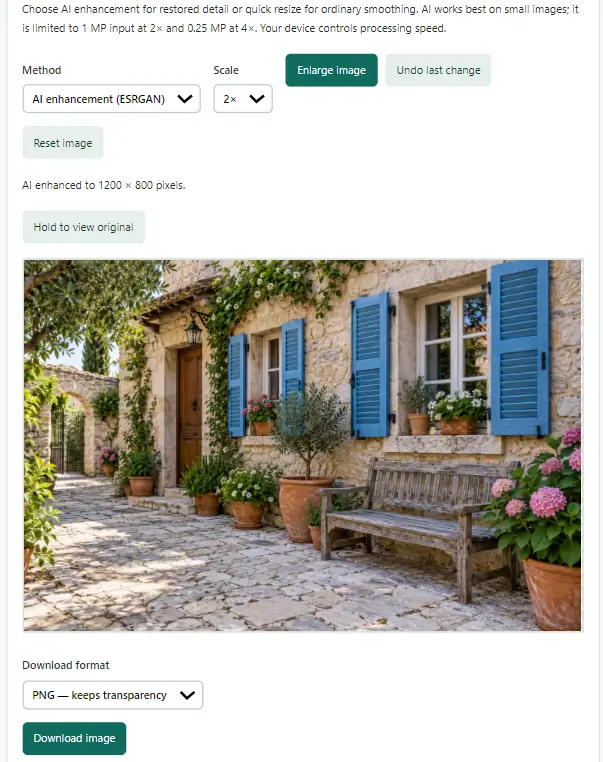
For the AI version, I used these settings and steps:
- Open the Upscale image tool.
- Select the 600 × 400 source PNG.
- Under Method, choose AI enhancement (ESRGAN).
- Set Scale to 2×.
- Click Enlarge image.
- Check that the completed dimensions are 1200 × 800 pixels.
- Select PNG under Download format and save the image.
I also took a screenshot showing the selected method, scale, completed dimensions, and preview.
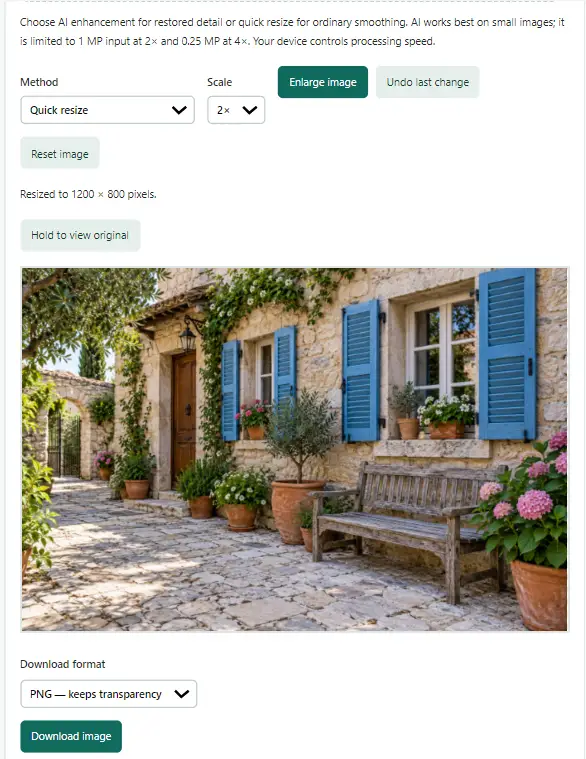
For the second run, I loaded the same small source PNG again, chose Quick resize, and kept the scale at 2×. I downloaded this version as PNG too.
Starting again from the source was important. Applying Quick resize to the AI output would have introduced an extra processing step and changed the comparison.
The tool lists AI input limits of 1 megapixel at 2× and 0.25 megapixels at 4×. My input contained 240,000 pixels, which was within the stated 2× limit. I tested only 2× enlargement.
Results from the Downloaded Files
I checked the saved files to confirm their dimensions, format, and exact byte counts.
| Measurement | Source image | AI enhancement, 2× | Quick resize, 2× |
| Format | PNG | PNG | PNG |
| Width | 600 pixels | 1200 pixels | 1200 pixels |
| Height | 400 pixels | 800 pixels | 800 pixels |
| Total pixels | 240,000 | 960,000 | 960,000 |
| File size | 689,855 bytes | 2,360,949 bytes | 2,253,436 bytes |
Both methods doubled the width and height, giving each output four times the source pixel count.
Both downloads also used more storage than the input. The AI version was 107,513 bytes larger than the Quick resize version—approximately 4.8% larger.
That is a measurable difference in file size, not a quality score. A heavier file does not prove that its details are more accurate or that it will look better on a page.
The images displayed in this article are compressed WebP copies. All file sizes in the table refer to the original PNG downloads, before conversion or compression.
What the Comparison Showed—and What It Did Not
At the displayed size, both versions preserved the courtyard composition. The shutters, bench, flowerpots, and paving remained in their original positions, with no cropping.
The two results looked similar overall. Fine foliage and some stone and wood textures remained soft, making these areas useful starting points for closer inspection.

AI enhancement, 2×
Quick resize, 2×This comparison covers one generated scene, one source size, and one enlargement factor. It does not measure processing speed or show how the methods handle faces, small text, or heavily compressed photographs.
Keeping the input, scale, and output format consistent made the two downloads suitable for a direct comparison.
How to Compare Your Own Enlarged Images
For a closer comparison, open both original downloads at 100% zoom and inspect the same area in each.
In this courtyard scene, I would concentrate on three locations:
The blue shutters: Check whether the slats remain separate and whether their edges look smooth, uneven, or surrounded by halos.
The wooden bench: Look at the narrow gaps and surface texture. Stronger-looking texture is not necessarily more faithful detail.
The foliage: Examine whether individual leaves remain distinguishable or merge into soft patches.
After inspecting details, compare both versions at the size you intend to publish. A small difference at full resolution may be difficult to notice in a compact article layout.
If you have a larger original, use it as a reference for shapes and textures. Remember that a 1536 × 1024 original and a 1200 × 800 result will appear at different sizes when both are viewed at 100%.
Choosing Between AI Enhancement and Quick Resize
Quick resize provides a useful baseline: it shows what an ordinary enlargement looks like at the required dimensions. The AI version is worth choosing when its changes visibly help the subject without introducing distracting alterations.
Ask yourself:
- Are important edges and features easier to distinguish?
- Does the texture look natural?
- Have small details changed in an unwanted way?
- Is the difference visible at the final display size?
If both versions look equally suitable at your intended display size, Quick resize is a reasonable choice. In my test, its PNG was also slightly smaller. Choose AI enhancement when you can see a useful improvement in the details that matter, without distracting changes elsewhere.
Preparing the Results for a Website
I keep the source PNG and both downloaded PNGs unchanged as the experiment records. The WebP images used in this article are separate publication copies.
Google’s WebP documentation explains that WebP supports both lossy and lossless compression. Lossy compression can alter fine details, so it can also affect how an upscaling comparison looks.
For the publication copies:
- Convert both outputs using matching settings.
- Avoid aggressive compression that conceals differences.
- Keep the comparison images at matching dimensions.
- Check that screenshot labels remain readable.
- Preview the finished article on desktop and mobile.
These WebP previews help keep the page lighter, but they should not replace the original downloads when assessing subtle quality differences.
For more on balancing file size and appearance, see my image compression guide. If you need a specific width or height rather than a scale multiplier, the image resizing guide covers that workflow.
Frequently Asked Questions
Does 2× upscaling double the number of pixels?
It doubles each dimension. In this test, 600 × 400 became 1200 × 800, increasing the total from 240,000 to 960,000 pixels.
Can upscaling recover all the original detail?
There is no guarantee. Creating a larger pixel grid does not prove that information lost during downsampling has been recovered accurately. Inspect important features before using the result.
Why were both PNG downloads larger than the source?
Both outputs contained four times as many pixels. PNG file size also depends on the image content and how effectively it compresses, so it does not increase by a fixed amount for every enlargement.
Should I compress the input before upscaling?
For a fair test, use the best available source at the intended input dimensions. Additional lossy compression can remove detail before the enlargement even begins. Prepare lighter website copies after evaluating the outputs.
What I Learned from This Test
Both methods enlarged my 600 × 400 source to 1200 × 800. Quick resize produced the smaller PNG, while the AI version needed closer inspection to judge whether its changes were useful.
For a small image, start with 2× and compare the downloads at the size you plan to use. If AI makes no useful visible difference, Quick resize is enough for that purpose. If both results remain too soft, look for a larger original rather than repeatedly enlarging the output.
Try both methods with the ToolsNest image upscaler, keep the version that works for your image, and compress a separate copy for publication.