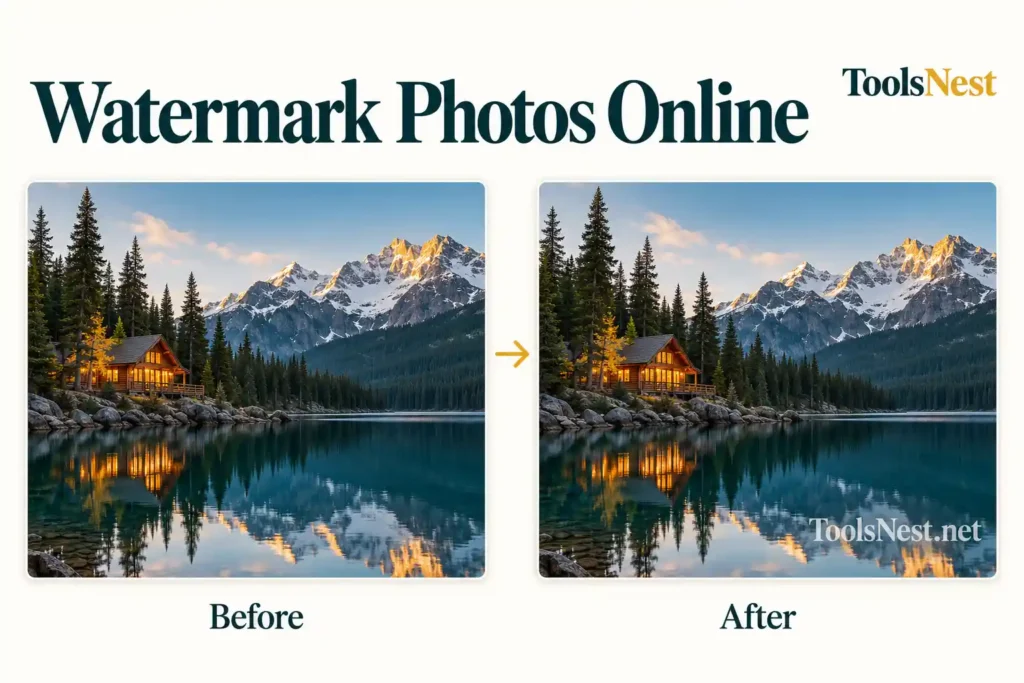
A watermark gives readers a visible name or website to associate with an image. Its usefulness depends on where you put it: the same white text can look clear over dark water and less distinct against a bright sky.
I tested the ToolsNest watermark image tool with a landscape image, downloaded the result, and compared two watermark positions. This guide explains how to watermark photos online, the settings I used, and why I chose the bottom-right version.
For the demonstration, I used an AI-generated image showing a wooden cabin beside a mountain lake. The watermarking test and downloaded results are real.
Table of Contents
What a Watermark Can—and Cannot—Do
A visible watermark can identify your website or brand when an image is shared. It can also discourage some casual reuse, especially when removing it would affect an important part of the picture.
It cannot prevent copying. Someone may crop around a corner mark or edit it out. For that reason, choose its placement according to your purpose:
- For attribution: a readable name near an edge can keep the main subject clear.
- For previews or client proofs: a mark across the subject, or a repeated pattern, is harder to crop away but more distracting.
For this test, I wanted visible ToolsNest branding without covering the cabin.
Prepare Your Image Before Adding a Watermark
Save a separate copy without the watermark; you can return to it whenever you want to try different settings.
If you already know the dimensions you need, resize your image first. A watermark that looks readable on a large image may become too small after the whole picture is reduced.
Next, decide what to add:
| Option | What you need | When it is useful |
| Text watermark | A name, website address, or short credit | Quick attribution without preparing a logo file |
| Logo watermark | An image file, preferably a transparent PNG | Using an existing brand design consistently |
A transparent PNG is useful for a logo because it avoids placing a solid rectangular background over the photo. This is separate from the format of the photo itself: my test image was WebP.
I chose text so I could check readability without preparing another file.
How to Watermark Photos Online With ToolsNest
- Open the watermark image tool.
- Select your source image.
- Enter your watermark text, or choose a logo file. A selected logo takes the place of the text.
- Adjust the size and opacity. For text, choose a color.
- Choose a position and click Add watermark.
- Download the result and open it to inspect the finished image.
The Size percentage controls the watermark’s target width relative to the image width; it is not a font size in pixels. Opacity controls how solid or transparent the mark appears.
Start with one image. Once you have checked the downloaded result, you can decide whether the settings suit other pictures too.
My Test: A WebP Landscape With a Text Watermark
The source image showed a wooden cabin beside a mountain lake. With pale sky above the mountains and deep-colored water below, the scene gave me two contrasting areas to test the white lettering.
Its dimensions were 1536 × 1024 pixels, and the tool displayed an input size of approximately 124.2 KB.
I used these settings:
| Setting | Value |
| Watermark text | ToolsNest.net |
| Logo | None |
| Size | 20% |
| Opacity | 60% |
| Text color | White |
| Position | Bottom right |
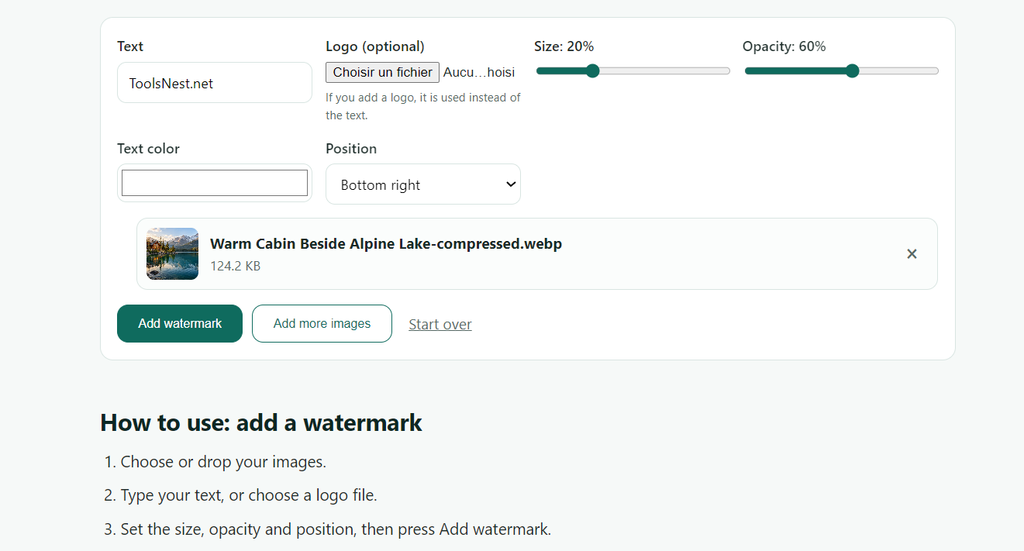
After downloading the image, I checked whether the text was readable and whether it covered anything important.
The bottom-right placement put ToolsNest.net over dark water. The text was easy to distinguish, while the cabin and mountain peaks remained unobstructed. This suited the attribution goal of the test.

Comparing Bottom Right With Top Right
For a second version, I changed only the position to Top right, keeping the same text, size, opacity, and color. I reused the unmarked image for this comparison, so each version contained just one watermark.
The top-right text remained readable, but its contrast was weaker against the pale sky. It also crossed the mountain peak.
I chose the version with the watermark over the lake, where the white text was easier to read and left the mountain scenery unobstructed.
That choice is specific to this image. A picture with bright sand or white clothing at the bottom right could need a different position or text color.
Checking the Downloaded File
The selected bottom-right result remained WebP and retained the original 1536 × 1024 dimensions.
Its measured file size was 309,752 bytes, or approximately 302.5 KiB. In this test, the watermarked copy took up more storage space than the original.
Adding a watermark does not guarantee a smaller download. The image is exported again, and the export settings can produce a larger file even when the dimensions stay the same. When saving the watermarked image, ToolsNest passes a quality value of 0.92 to the browser’s encoder for formats that accept this setting.
For more detail, see MDN’s explanation of image export quality. The quality setting controls how formats such as JPEG and WebP are encoded; it does not specify a percentage reduction in file size.
If file size matters for your page, compress the finished image afterward. Then check the lettering again: reducing file size is less useful if the watermark becomes difficult to read.
How to Choose a Readable Watermark
The position menu is a starting point. The background beneath the lettering determines how well it works.
On this landscape, white text stood out against dark water. Before choosing your own settings, check:
- Contrast: can you distinguish the letters from the area behind them?
- Subject visibility: is the watermark hiding anything readers need to see, such as someone’s expression or a detail on a product?
- Display size: is the text still readable when the image appears at the size readers will see?
- Purpose: are you adding a credit, or making a preview harder to reuse without editing?
Avoid treating 20% size and 60% opacity as universal settings. They worked for this particular image and text length; a longer website address or a different composition may need adjustment.
When to Use a Repeated Watermark
ToolsNest also offers Repeat across the image, which places the mark in a diagonal pattern.
A repeated watermark can make sense for previews or proofs because cropping one corner will not remove every instance. The trade-off is that it covers more of the image.
For this blog illustration, I preferred one mark near the edge. A repeated pattern would have competed with the cabin and reflections.
I tested the two single-position versions described above; a repeated pattern was not part of this comparison.
Common Mistakes to Avoid
Checking only the preview. Open the downloaded file as well. Confirm the text, dimensions, format, and final appearance.
Using the watermarked result as the next input. When comparing positions, return to the unmarked source so the previous watermark does not remain underneath.
Choosing a corner automatically. A corner may suit attribution, but it can also be easy to crop away. Match the placement to your goal.
Making the mark too dominant. Larger or more opaque text is easier to notice, but it may distract from the image.
Forgetting the final display size. Inspect the image at the width you plan to use in your article, not only enlarged on your monitor.
Frequently Asked Questions
Can I add a text watermark to a WebP image?
Yes. In this test, I opened a WebP image, added ToolsNest.net as text, and downloaded a watermarked WebP result.
Does watermarking change the image dimensions?
The downloaded result in this test stayed at 1536 × 1024 pixels, matching the source. Its file size changed even though its dimensions did not.
Should I resize before or after watermarking?
For a known publishing size, resize first so you can choose a readable watermark at those dimensions. If you resize afterward, inspect the lettering again before publishing.
Is a corner watermark enough to prevent copying?
No. A corner mark can provide attribution, but it may be cropped or edited out. Even a repeated watermark cannot guarantee that an image will not be reused.
What logo format should I use?
Choose a PNG logo with transparency so the photo remains visible around the logo’s edges instead of being covered by a solid rectangle.
Try One Image and Check the Result
In this test, changing only the position improved the watermark’s contrast and kept it away from the mountain peak. The bottom-right version suited the image better, even though both versions used identical size and opacity settings.
Try the ToolsNest watermark image tool with one of your own images. Keep the original, compare placements, and inspect the download at its intended display size before publishing.